Catch the calves with a calf halter and tie them to something secure.
Never leave tied calves unsupervised!
Proper restraint is necessary to ensure the safety of both yourself and the calves. Calves should be tied tight enough that you can control the calf’s movements but preferably in a way that allows you to still have access to both horns.
1.1 SEDATION?
Sedating calves makes handling a lot easier during the disbudding process however, it does not replace the administration of a local nerve block! Local anesthetic and an NSAID are still essential for pain control, even in sedated calves.
1.2 GOOD RESTRAINT TECHNIQUES
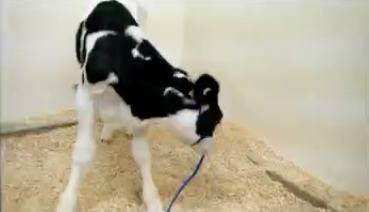
Tie the calf to something secure in a way that limits their movement but without causing unnecessary distress. Calves who are not used to being tied will struggle against the restraint even when tied correctly, as shown in the video below.
In the video, the calf is tied too loose, and it may be difficult to control the calf’s movements.
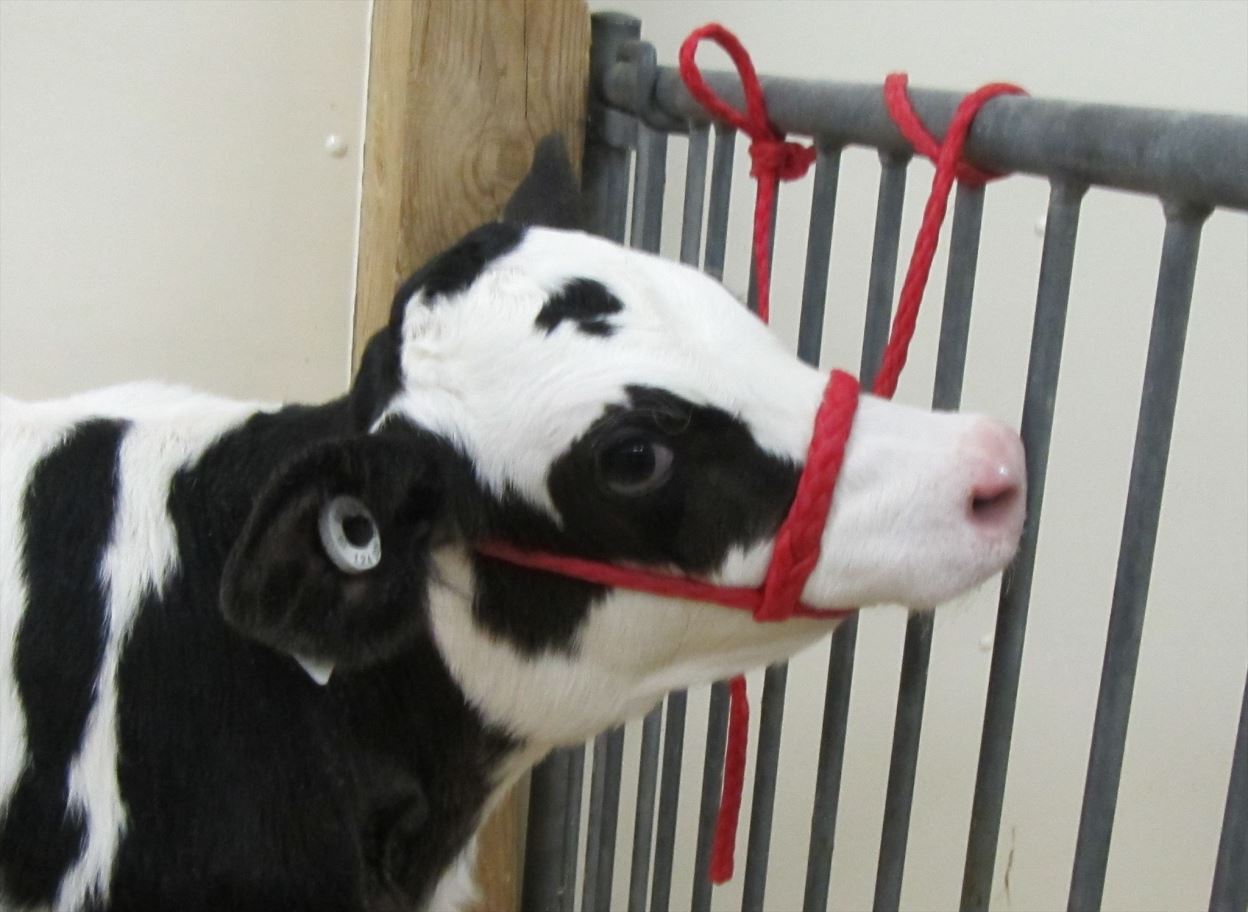
1.3 TYING THE CALF'S HEAD TO THE SIDE
If you have a pen, you can use this to your advantage by pulling their head through the windows and tying it to the side. It is often easier to tie the calf’s head to one side (allowing access to one horn bud) then untie and tie to other side as needed, as shown below.
Previous
Next
STEP 2: SEDATING THE CALF
*Optional
If you wish to sedate your calves, do so now before to administer the nerve block. If you do not wish to sedate your calves, proceed to the next step.
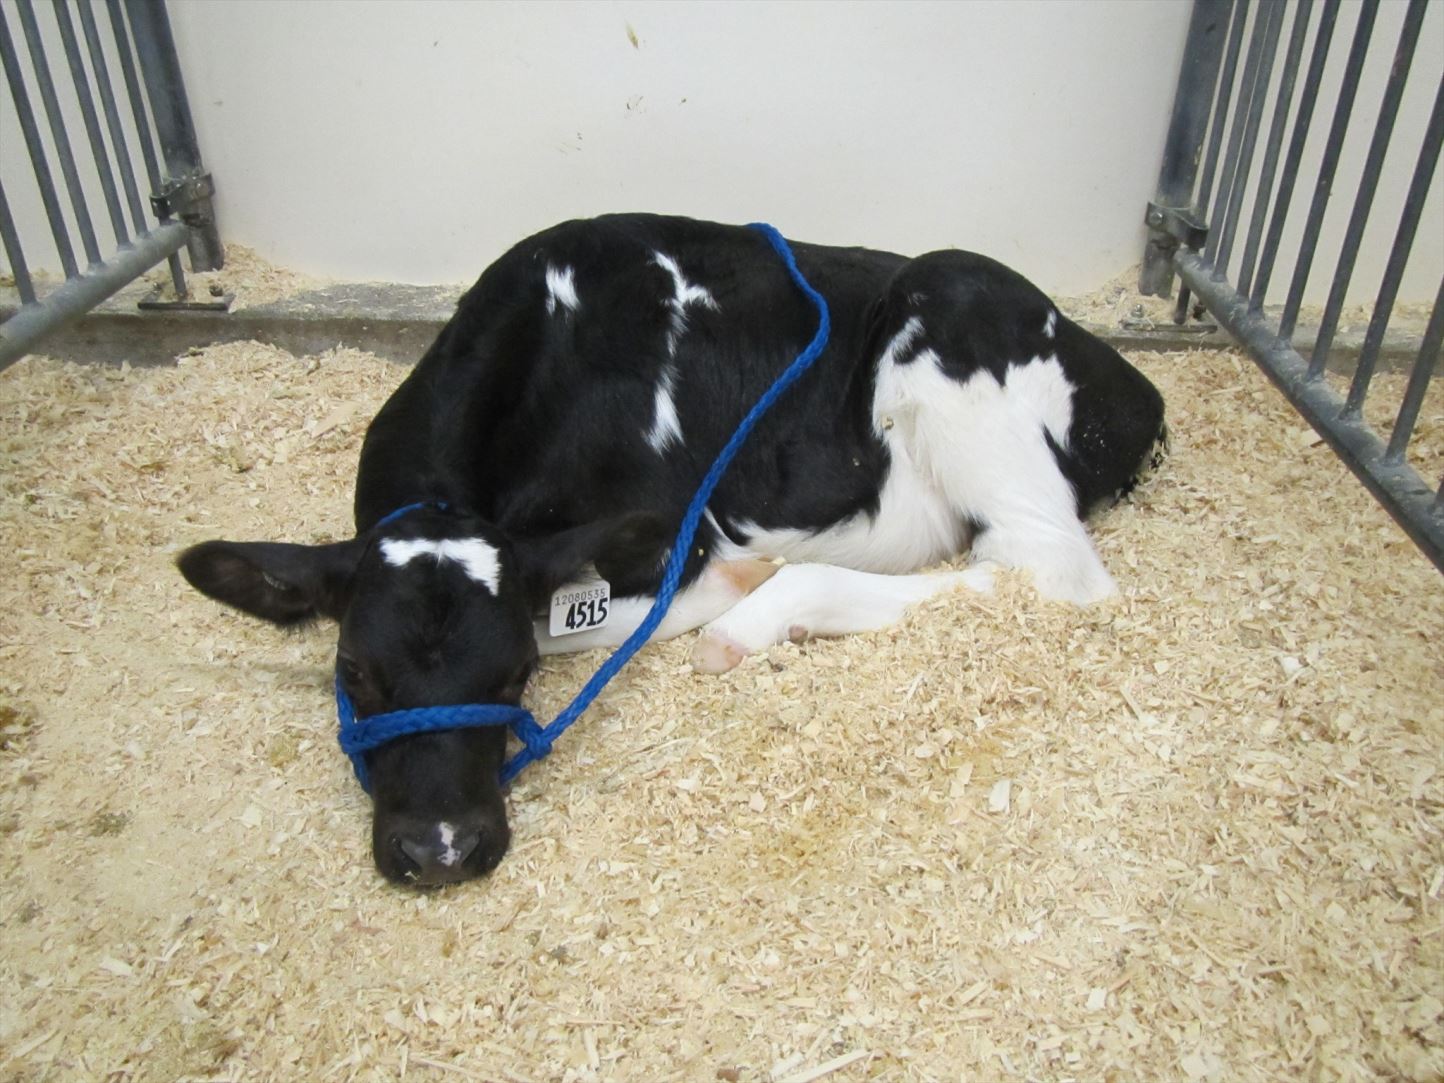
Sedated calves are much easier to handle but it also requires extra caution.
Sedation can be mild or heavy sedation – speak wth your veterinarian to see what is appropriate for your farm. Sedation does not replace pain control – both local anesthetic and an NSAID are still needed.
Previous
Next
2.1 DEGREES OF SEDATION AND THEIR BENEFITS
When sedating calves there are two degrees of sedation to choose from each with their own benefits.
MILD SEDATIVE BENEFITS:
Calf is still standing but will struggle less during the injection of the local pain block and even less during the disbudding process.
Calf may fall down during the disbudding process; will be unstable standing up.
Need to supervise calves until they fully awake from the sedation.
Sedated calves are much easier to handle but it also requires extraDo not mix sedated and non-sedated calves in the same pen. caution.
Make sure calves are in a clean and dry pen.
Sedating a calf does not replace administering a nerve block and NSAID.
STEP 3: draw up lidocaine
Fill your 12 mL syringe with 10 mL of lidocaine. Remember to use a clean needle in the bottle and add a new needle to the syringe for each calf.
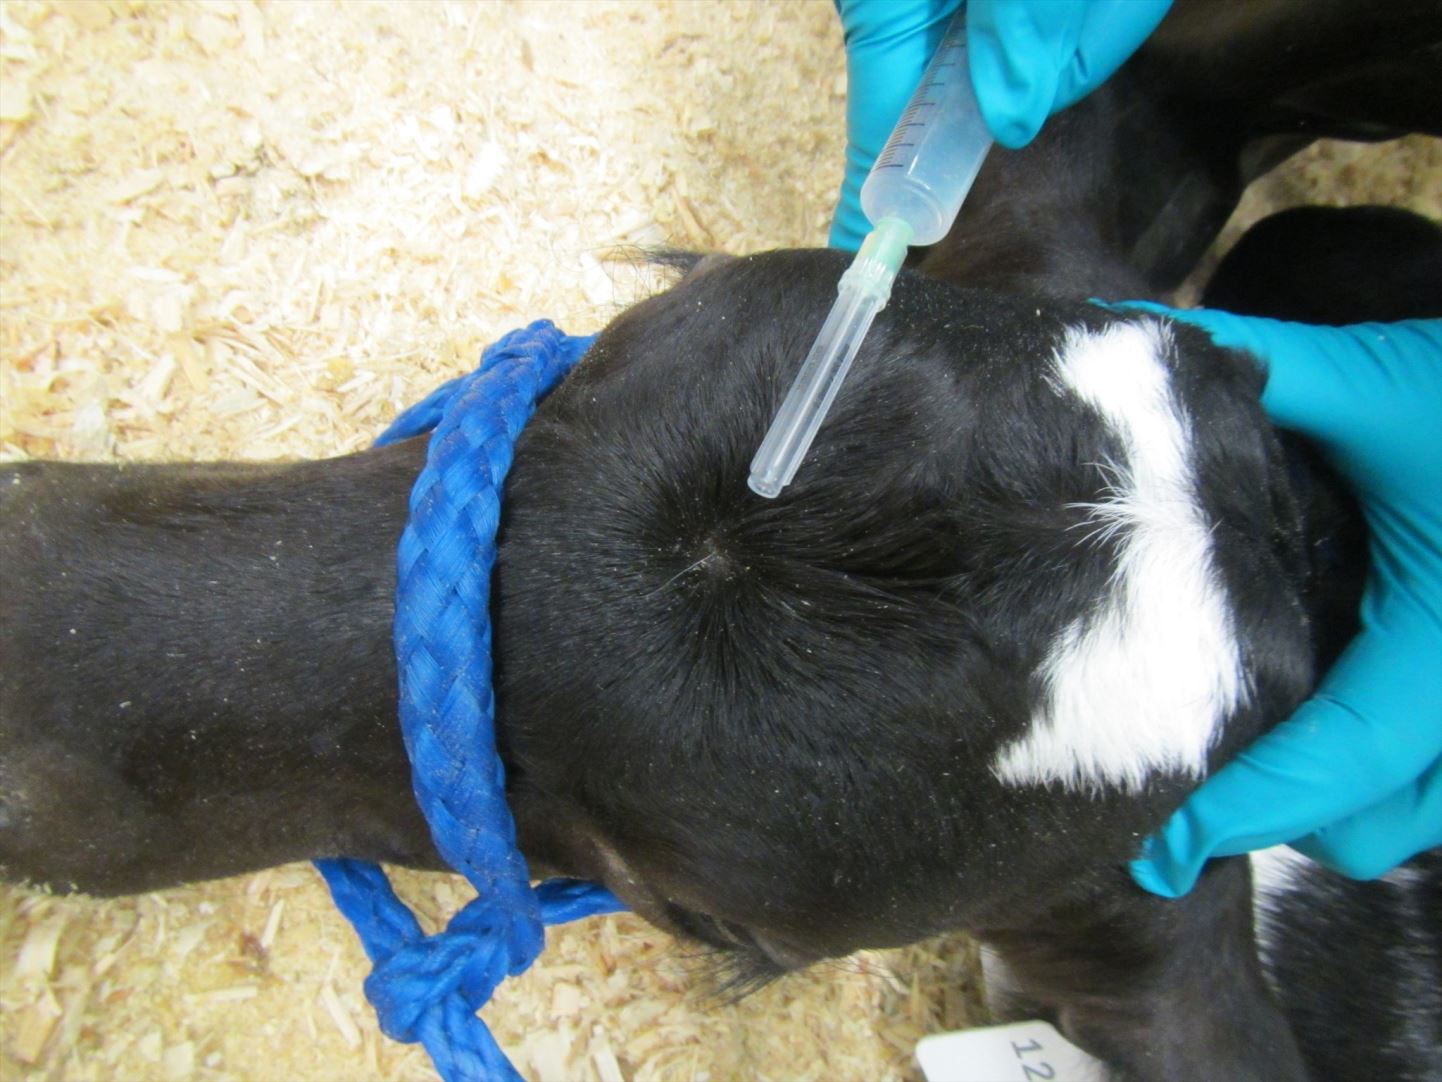
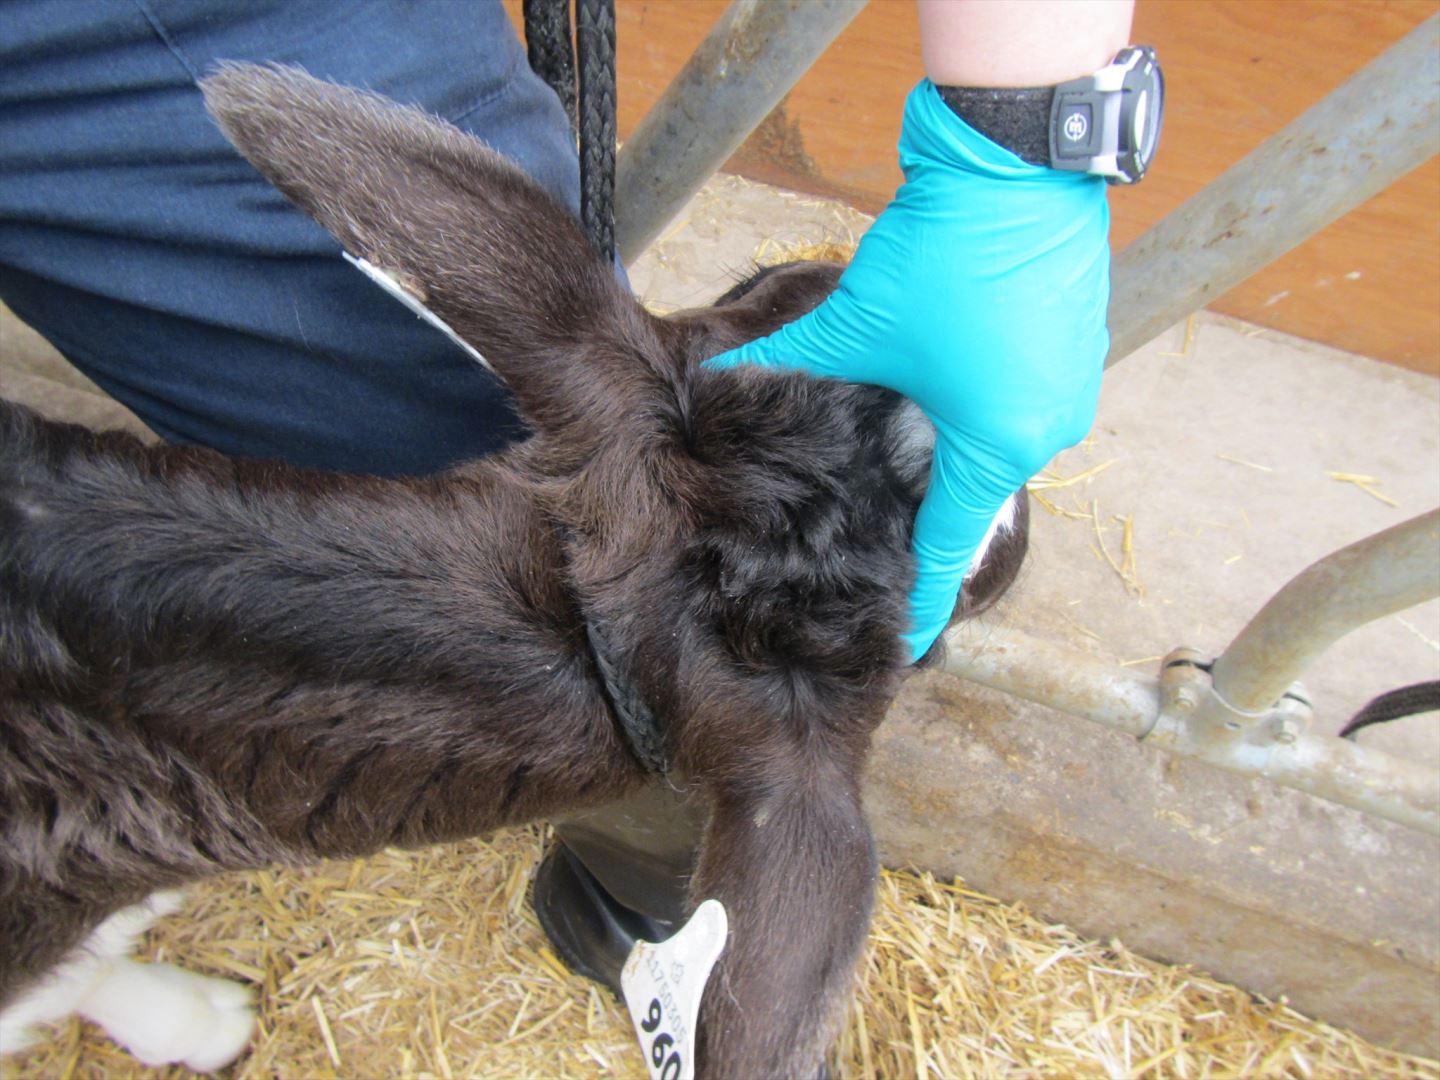
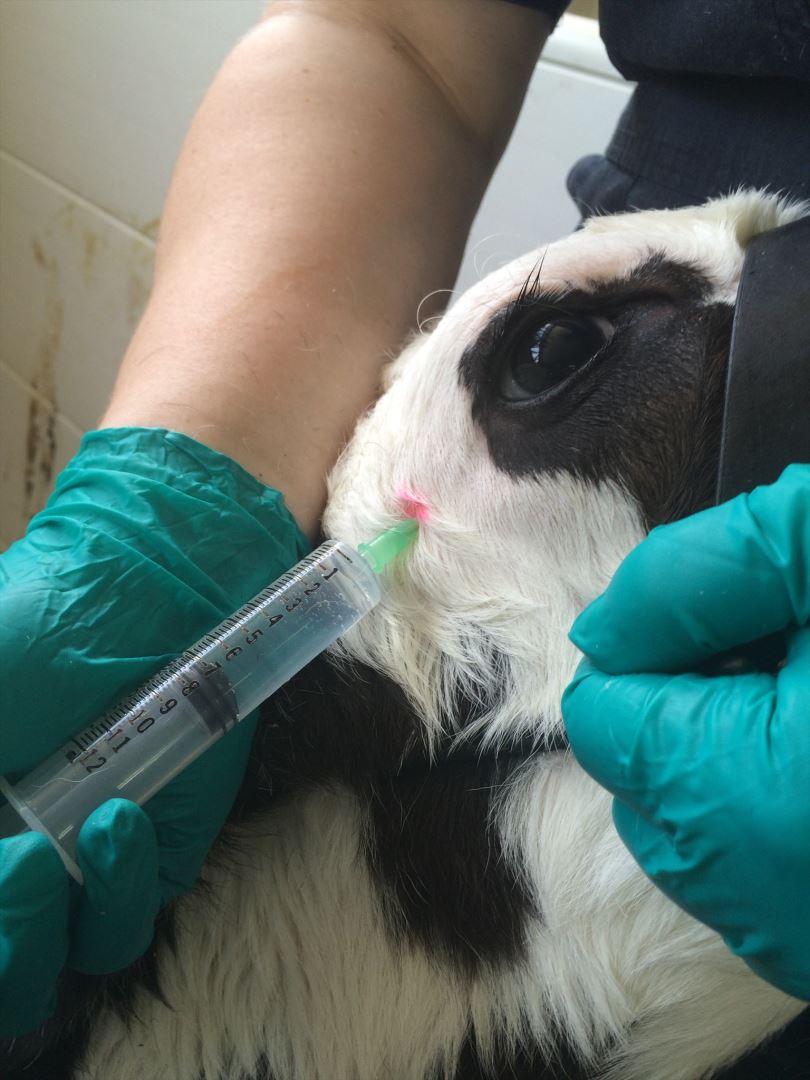
STEP 4: LOCATE THE INJECTION SITE
Start by locating the horn bud. Run your hand down the side of the calf’s face towards the outer corner of the eye; you should feel a ridge. The injection site is located just below the ridge where it ends at the outer corner of the eye (red dot). You can feel a slight depression. See videos below for reference.
Pull the needle out slightly, redirect and try again until you do not draw blood.
If blood is drawn during injection, you should always get a new syringe (and needle) before proceeding to the next calf. *18- (or 20-) gauge needle x 1.5″.
To find the injection site, start at the horn bud and follow the ridge along the side of the of the face to the corner of the eye.
Angle the needle towards the middle of the calf’s head between the eyes.
Always pull back on the syringe before injecting.
Inject a total of 5 mL per horn (on each side) but remember to redirect the needle 3x and inject a bit as you pull the needle out.
Rub the injection site after you are done.
Wait at least 5 minutes for the nerve block to take effect.
Always use a new needle for each calf.
STEP 6: WAIT 5 MINUTES
6.1 WHILE YOU ARE WAITING
Administer the nerve block to the other calves,
Clip the hair around the horn buds,
Administer Metacam (or other NSAID),
Common practice to check for extra supramammary teats at time of dehorning.
6.2 WAS MY NERVE BLOCK SUCCESSFUL?
If your nerve block was successful the calf should not overly react when you place the disbudding iron against their head.
If there is a significant reaction by the calf then your nerve block was not successful.
If the calf did not react at the initial contact but starts bucking or moving around afterwards, the nerve block was most likely successful; the calf is just resisting being restrained.
Watch the video below to see the difference between an unsuccessful (first horn) and a successful (second horn) nerve block:
6.3 clipping hair around the horn buds
Clipping hair can make it easier to visualize the location of the horn buds. Horn buds will appear grey under black hair but pink under white hair.
Administer NSAID according to label directions or your veterinary prescription.
STEP 7: begin disbudding
7.1 caustic paste disbudding
Step 1
Restrain the calf and ensure you can see and feel the horn bud.
Step 2
Wear gloves! Caustic paste will burn your skin.
Step 3
Apply a ring of petroleum jelly around the horn bud, to help make sure the paste doesn’t run or drip.
Step 4
Apply a thin layer of paste to the horn bud (for most calves, a dime-sized amount is sufficient). If using a tub of paste, you can do this with a gloved finger, or with a popsicle stick.
Previous
Next
Step 5
If paste gets on your hands or other parts of the calf besides the horn bud, flush the area with vinegar to neutralize the paste.
Step 6
Check calves 30 to 60 minutes after paste application to ensure paste hasn’t been rubbed onto other parts of the body or in their eyes. By using the never block ahead of applying the paste, you will help reduce the chance calves will rub their horn buds, since they will not be feeling any discomfort!
7.2 CAUTERY (IRON) DISBUDDING
Step 1
Get a strong hold of the calf’s head and feel for the horn bud.
Step 2
Apply the tip of the disbudding iron over the horn bud; keeping it perpendicular to the calf’s skull
Step 3
Apply firm and even pressure for approximately 10 seconds.
Step 4
During the last 5 seconds provide a slight rotating motion.
Step 5
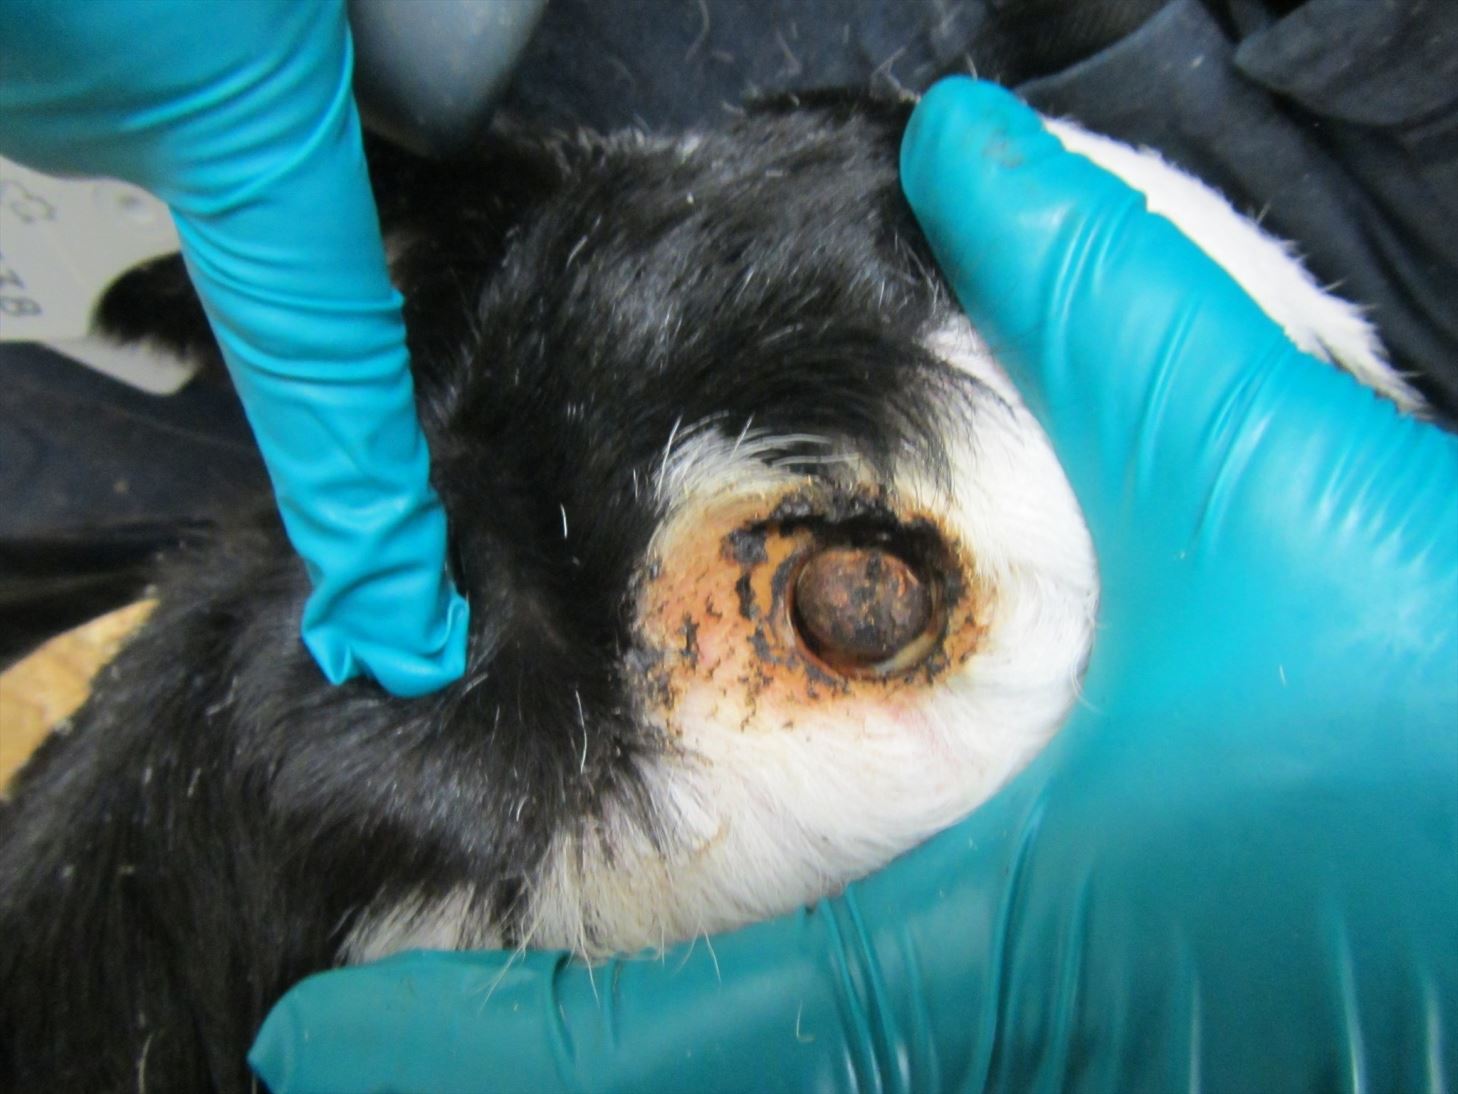
Use the tip of the disbudding iron to remove the cauterized tissue; you should see a white circle underneath (totally normal).
Being able to remove the cauterized tissue usually indicates that the process was successfully completed.
Use the hot iron to cauterize the wound and stop the bleeding.
Below are pictures of what it should look like when you are done:
Previous
Next
7.3 IF YOU ARE USING A BLUNT DISBUDDING TOOL
An alternate method of disbudding calves is to leave the cauterized tissue on the horn bud. The initial steps are the same, except the disbudding iron should be left on the horn bud for a slightly longer period of time. When the burn is complete you should be able to see a nice copper ring around the edge of the horn bud.
It is important to keep the wounds clean especially during the first few days of healing and during fly season. Keep the calf pens clean to reduce flies and the possibility of maggot infestation. Check the calves daily. Should any abnormalities arise, consult your veterinarian immediately.
8.1 EXAMPLES
Chlorhexidine
Topical wound spray
Dilute hydrogen peroxide
STEP 9: clean up
When you are done:
Double check each calf to ensure there is no bleeding and disbudding occurred correctly.
